Disclosure: This post contains affiliate links, including Amazon Associates links. If you buy through them, we may earn a commission at no extra cost to you. As an Amazon Associate I earn from qualifying purchases.
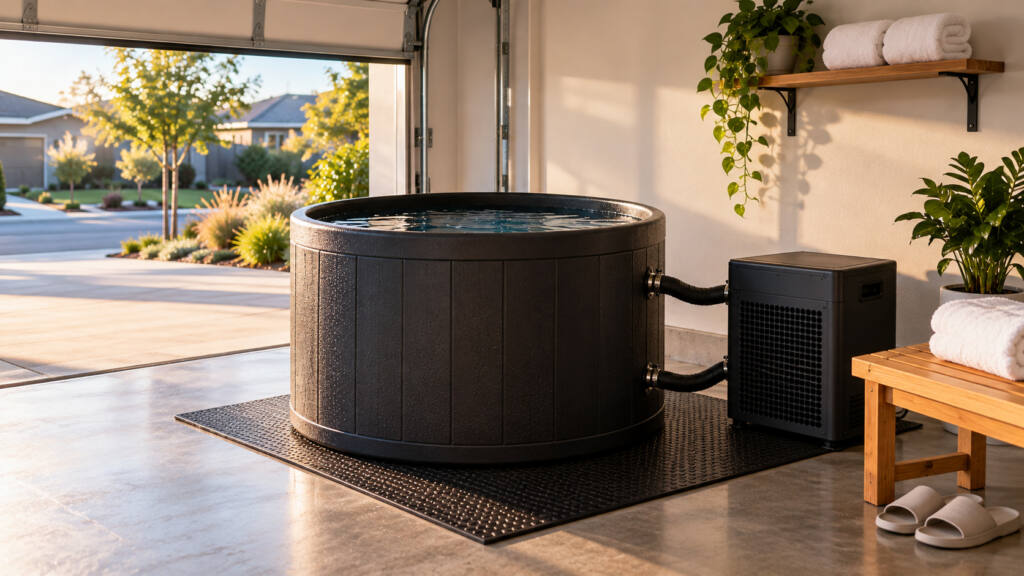
Learning how to set up a cold plunge in a garage starts with choosing a safe location, planning drainage, and deciding whether you actually need a water chiller.
For many US homeowners, the garage is one of the most practical places to install a cold plunge. It usually offers more floor space than a bathroom, a concrete slab capable of supporting ordinary residential garage loads, and easier access to utilities.
You also avoid carrying ice through the living room or worrying about splashing water onto hardwood floors.
However, garages introduce their own problems. Summer temperatures can make refrigeration expensive, winter freezing can damage equipment, and poorly ventilated garages may contain vehicle exhaust, gasoline fumes, or other contaminants.
A successful installation needs to account for all of these conditions.
This guide explains how to set up a garage cold plunge safely, including space planning, electrical requirements, drainage, insulation, sanitation, installation costs, and equipment recommendations.
Bottom Line
For most homeowners, the best garage cold plunge setup is an insulated tub on a sound concrete slab, with controlled drainage, a suitable 120V electrical connection if refrigeration is used, and enough room for safe entry and maintenance.
If you are starting on a tight budget, consider a portable tub such as The Pod Company Ice Pod and use ice before investing in a chiller.
For a more permanent installation, the Ice Barrel 300 is worth considering because of its rigid, insulated construction and compact footprint.
If you want to maintain a consistent water temperature without carrying bags of ice, investigate The Pod Company Standard Chiller or a compatible DIY chiller system.
The Pod Company Standard Chiller
Do not buy refrigeration equipment until you know the garage’s summer and winter temperature range, the tub’s actual water volume, and the electrical requirements of the complete system.
For budget chiller options, see our guide to cold plunge chillers under $1,000.
1. Can You Actually Put a Cold Plunge in a Garage?
In most cases, yes. A garage can be a good location for a cold plunge, provided the floor, drainage, electrical installation, and surrounding environment are suitable.
Unlike an elevated balcony, a typical ground-level garage has a slab-on-grade floor. That can make supporting a water-filled vessel more straightforward.
However, a concrete floor is not automatically suitable for every load or installation.
Cracked slabs, suspended garage floors, deteriorated concrete, and unusual structural conditions may require professional evaluation.
Space Requirements
A compact cold plunge may occupy approximately 3′ × 3′, while a longer tub may need more than 5 feet of length.
Plan additional clearance for entering and exiting, removing the cover, accessing the drain, and servicing equipment.
Avoid placing the tub where it blocks a vehicle, electrical panel, or required exit route.
Water Access
A nearby utility sink, laundry faucet, or hose bib makes filling easier.
If your garage has no water connection, you may be able to use a compatible hose from an indoor faucet.
Do not assume a permanent plumbing modification is necessary.
Drainage
The garage may have a floor drain, but not every garage does.
And even when a drain exists, it may not be approved for the discharge of large amounts of water.
Plan how you will empty the tub before filling it.
Permits and Building Requirements
A portable ice-only tub may not require a building permit if no permanent work is involved.
However, new electrical circuits, outlets, drains, plumbing connections, or structural modifications may require permits and inspections.
Local requirements vary.
For a permanent installation, check with your building department before beginning work.
2. Garage-Specific Advantages
A garage has several practical advantages over a bathroom, apartment balcony, or indoor living area.
More Floor Space
A single-car garage is commonly around 12′ × 20′, although actual dimensions vary.
You may be able to place a compact plunge along a wall while retaining space for storage or exercise equipment.
This gives you more flexibility than a small bathroom.
Concrete Flooring
A properly supported slab-on-grade floor is often a better starting point for a heavy water-filled vessel than an elevated wood-framed floor.
Water weighs approximately 8.34 pounds per gallon.
An 80-gallon plunge contains around 667 pounds of water before the tub and occupant are added.
Inspect the slab for significant cracking, settlement, or damage before installation.
Easier Utility Access
Many garages have electrical outlets, hose bibs, or utility sinks nearby.
Some also have an electrical panel.
This can reduce installation complexity, although a nearby panel does not guarantee that the existing circuit has sufficient capacity.
Privacy
A garage can provide a private place to plunge without occupying a bathroom.
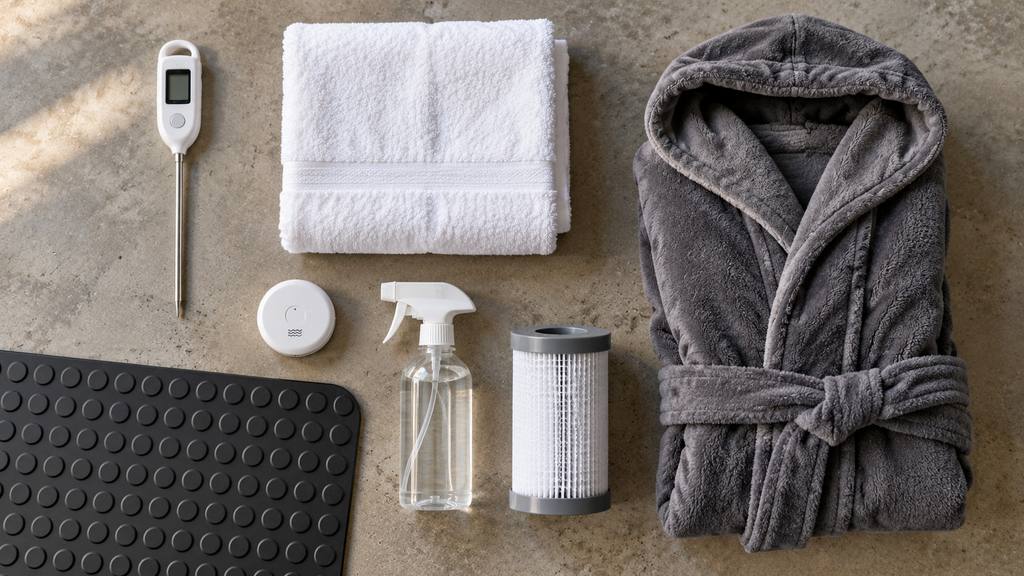
You can keep towels, a changing robe, and cleaning supplies nearby.
Room for a Sauna
A garage can sometimes accommodate both a cold plunge and a compact sauna.
That makes it useful for homeowners interested in alternating heat and cold exposure.
For the sauna installation itself, see our guide to setting up a sauna in a garage.
However, combining the two increases the importance of electrical capacity, ventilation, moisture management, and safe spacing.
3. Garage-Specific Challenges
Garages are not climate-controlled living rooms.
Before installing a plunge, consider the following problems.
Summer Heat
An uninsulated garage can become very hot during summer.
In warmer US climates, interior garage temperatures may exceed 90°F or 100°F.
A chiller must remove heat entering the water from the surrounding air.
The hotter the garage, the harder the refrigeration system may need to work.
An insulated tub and adequate chiller ventilation can help.
Winter Freezing
In colder climates, garage temperatures may fall below 32°F.
Water left inside hoses, pumps, or chillers can freeze and damage components.
Do not assume that a chiller designed to cool water also provides freeze protection.
Follow the manufacturer’s winterization instructions.
Moisture and Condensation
Cold water can cause condensation on the outside of a tub.
Splashing and draining also introduce moisture.
Over time, persistent dampness can affect drywall, stored belongings, and metal equipment.
Keep the area dry and ventilated.
Dust and Pests
Garages collect dust, insects, and debris.
Use a properly fitted plunge cover.
Clean the surrounding area regularly.
Carbon Monoxide and Vehicle Exhaust
This is a major garage-specific safety concern.
Never use a cold plunge in a garage while a vehicle engine, generator, or fuel-burning appliance is producing exhaust in the space.
Carbon monoxide is odorless and can be deadly.
Opening the garage door is not a reliable substitute for preventing exposure.
Do not idle vehicles in an attached or detached garage, even with the door open.
Keep the plunge away from gasoline, solvents, pesticides, and other hazardous stored materials.
A carbon monoxide alarm may provide an additional warning, but it does not make an unsafe environment suitable for bathing.
4. What Size Cold Plunge Fits a Garage?
A garage usually offers more space than a balcony, but choosing the right tub still matters.
A compact model is easier to fill, cool, drain, and clean.
Real Tub Options
| Product | Approximate footprint | Water capacity | Best garage situation |
| The Pod Company Ice Pod | Around 32″ diameter | Varies by version and fill level | Budget-friendly portable setup |
| The Pod Company Long Pod | Around 62″ × 27″ | Up to approximately 126 gallons | Longer, narrow floor area |
| Ice Barrel 300 | Around 35.5″ × 35.5″ | Approximately 77 gallons | Compact permanent setup |
| Plunge Air | Around 61″ × 32″ | Depends on configuration | Larger garage with dedicated plunge area |
Dimensions and capacities should be verified for the exact model before purchase.
The Pod Company Ice Pod
A sensible option for homeowners who want to begin with ice and avoid a permanent installation.
Owners on cold plunge forums frequently mention that the Ice Pod works well in a garage but that the concrete floor can make the water feel colder than expected in winter. The most common tip is to add an insulating mat underneath and keep a robe nearby.
The Pod Company Long Pod
Its longer shape may provide a more comfortable seated position, but its greater potential water volume adds weight and cooling demand.
Ice Barrel 300
A rigid, insulated tub that may work well in a dedicated garage corner.
Owners who install this in a garage consistently note that the 700-pound filled weight requires careful placement near a load-bearing wall or column. The most common complaint is that the drain assembly is tight to reach when the tub sits against the wall.
Plunge Air
An option for homeowners with more space and a larger equipment budget.
Filled Weight
Always calculate the complete load.
| Water volume | Water weight |
| 50 gallons | 417 lb |
| 70 gallons | 584 lb |
| 80 gallons | 667 lb |
| 100 gallons | 834 lb |
| 126 gallons | 1,051 lb |
For a quick reference of total setup weight by tub size, see our cold plunge floor load calculator.
Add the empty tub, occupant, and accessories.
For an ordinary sound slab-on-grade garage, these loads may be manageable, but unusual slabs or suspended floors should be assessed professionally.
5. Electrical Requirements: 120V vs. 240V
An ice-only plunge does not need electricity.
A refrigerated plunge usually does.
Standard 120V Chillers
Many compact cold-plunge chillers operate on ordinary US 110–120V household power.
For example, The Pod Company Standard Chiller is listed at approximately 280W and uses a 110V plug.
That makes it more practical for many garages than equipment requiring a new 240V circuit.
However, a compatible voltage does not guarantee that the existing outlet is suitable.
Do You Need a Dedicated Circuit?
It depends on the chiller’s electrical requirements and what else is connected to the circuit.
Garage circuits may already power refrigerators, freezers, tools, or battery chargers.
A chiller with a compressor creates an additional electrical load, including startup current.
Have an electrician evaluate the circuit if you are uncertain about available capacity.
GFCI Protection
Garage receptacles are generally subject to GFCI requirements under modern US electrical codes, with details depending on the locally adopted code and installation.
Use the protection required by the applicable code and equipment instructions.
Do not bypass a GFCI if a chiller repeatedly trips it.
What About 240V?
Some larger water-cooling equipment uses 208–240V power.
Most small residential plunge installations do not need that level of equipment.
If you choose a 240V model, have a qualified electrician install the required circuit.
Do not improvise adapters or connect equipment to an unsuitable dryer or workshop receptacle.
Electrical Safety Around Water
Keep plugs and connections away from splash zones.
Avoid ordinary extension cords.
Follow the manufacturer’s instructions for operation during immersion, including any requirement to shut off or disconnect equipment before entering the tub.
6. Drainage and Water Management
A garage floor drain is useful, but it is not guaranteed.
Many residential garages have no floor drain at all.
Filling the Tub
The easiest method is usually a garden hose connected to a suitable hose bib or utility faucet.
Use a clean, drinking-water-compatible hose where practical.
Do not leave the tub filling unattended.
Follow the manufacturer’s recommended fill level and allow space for water displacement.
Using a Garage Floor Drain
If your garage has a drain, determine where it leads.
Some drains connect to sanitary sewer systems, some to other drainage arrangements, and some may be restricted by local regulations.
Do not assume the drain is approved for plunge-water discharge.
Confirm that it is suitable and that the discharge rate will not overwhelm it.
Draining Without a Floor Drain
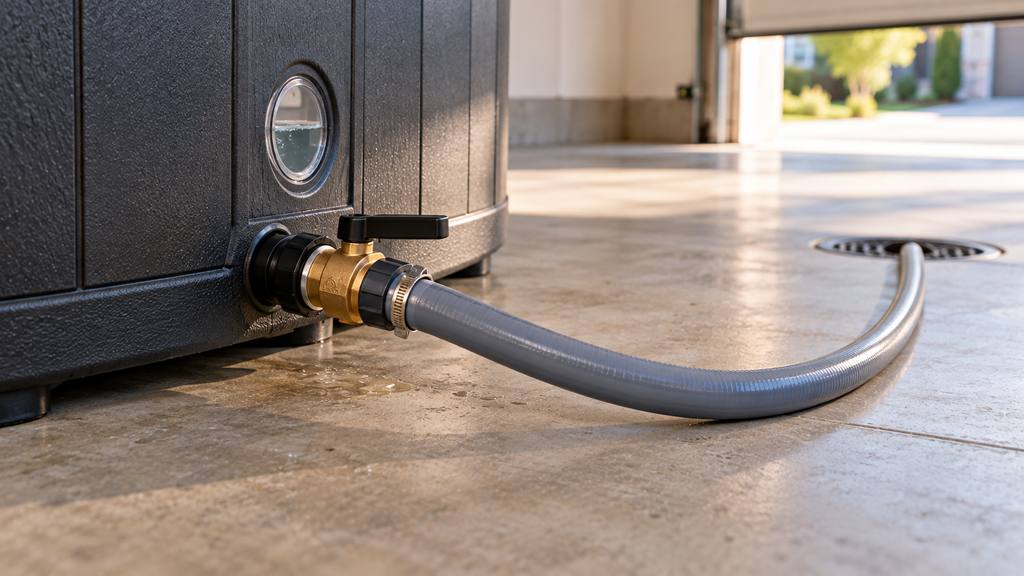
A drain hose can often route water to an approved utility sink, bathtub, or other permitted drain.
If gravity drainage is not possible, a compatible transfer pump may be required.
Avoid routing water across finished floors or through areas where a loose hose could cause damage.
Wet/Dry Vacuum
A wet/dry vacuum can help remove small amounts of residual water during cleanup.
It is not a practical primary method for emptying an entire 80-gallon plunge.
A real accessory worth considering is the RIDGID 6-Gallon Wet/Dry Shop Vacuum, which is useful for general garage cleanup when used according to its instructions.
Owners typically report that the 6-gallon size is enough for cleaning up splashes and spills around the plunge, but not for emptying the tub itself. The most common tip is to keep the vacuum stored dry and away from the tub to avoid accidental tip-overs.
RIDGID 6-Gallon Wet/Dry Shop Vacuum
Avoid Flooding
Before the first full fill, test the drain valve and hose connections with a small amount of water.
Keep the discharge hose secured.
Never leave draining unattended.
7. Floor Protection and Weight Distribution
A garage slab is often a practical foundation for a cold plunge, but the surface still needs protection.
Inspect the Concrete
Look for significant cracking, settlement, uneven surfaces, and existing moisture problems.
A level tub is important for stability and even loading.
Do not place a heavy plunge on an unstable platform or damaged section of concrete.
Rubber Floor Mats
A durable rubber mat may help prevent scuffs and provide a defined equipment area.
One real option is a Rubber-Cal rubber utility floor mat.
Choose a mat compatible with the tub’s base.
Avoid soft foam that compresses unevenly.
Buyers frequently mention that a heavy-duty rubber mat protects the concrete well and stays in place. The most common note is that water can pool underneath if the garage slab has low spots, so lifting it to dry occasionally matters.
Weight Distribution
A wide base may distribute contact pressure over a larger area, but a mat does not increase the slab’s structural capacity.
Do not build an elevated plywood platform without evaluating stability and load support.
Keep the Floor Dry
Standing water can create slipping hazards and contribute to moisture problems.
Use non-slip surfaces where appropriate.
Dry splashes promptly and inspect beneath the tub regularly.
8. Temperature Control: Ice vs. Chiller
The right cooling method depends on how often you plunge and how hot or cold your garage becomes.
Ice-Only Setup
For occasional use, ice is usually the simplest approach.
Fill the tub with tap water, measure the temperature, and add ice gradually.
The amount needed depends on water volume, starting temperature, desired temperature, and ambient conditions.
Cooling 60 gallons of water from 70°F toward 50°F may require roughly 50 pounds of ice under simplified ideal assumptions.
Actual requirements can be higher.
Using a Chiller
A chiller is more convenient for frequent use.
The The Pod Company Standard Chiller is a real plunge-oriented option that may suit a moderately cool garage.
The Pod Company Standard Chiller
The manufacturer lists a 1/3 HP compressor, approximately 280W power consumption, and an advertised minimum temperature around 41°F under suitable conditions.
Garage owners frequently mention that the Standard Chiller runs reliably in moderate climates but struggles in garages that reach above 90°F in summer. The most common tip is to place it near the garage door or a shaded corner for better airflow.
DIY Chiller Option
The Active Aqua 1/4 HP Water Chiller is another real product to investigate for a custom circulation system.
Active Aqua 1/4 HP Water Chiller
It is a hydroponic water chiller, not a complete cold-plunge system.
You will need compatible circulation equipment, filtration, hoses, and an appropriate sanitation strategy. Confirm that the intended human-immersion application is supported before purchase.
Chiller Placement
Leave the required airflow clearance around the condenser.
Do not place the unit inside a sealed cabinet.
Keep it away from vehicle exhaust, dust accumulation, and chemical storage.
Insulation
An insulated tub reduces unwanted heat gain and may lower chiller runtime.
In a hot garage, insulation can make a substantial difference.
A fitted cover also helps reduce debris and heat transfer.
Winterization
If the garage may freeze, follow the manufacturer’s instructions for draining and storing the chiller.
The Pod Company specifically warns that its chiller is not designed to protect itself from freezing, even when left running.
Do not rely on continuous circulation to prevent freeze damage.
9. Water Maintenance and Sanitation
A garage cold plunge needs a regular cleaning routine.
Cold temperatures do not eliminate bacteria, and a garage can introduce dust, pollen, insects, and other debris.
Use a Fitted Cover
A cover helps keep dirt out of the water and reduces temperature changes.
The Ice Barrel 300 includes an insulated lid and a protective cover.
Keep the cover clean, and do not assume it makes the water sanitary.
A cover helps keep debris out, but it does not sanitize the water. To learn the difference between filtration and sanitation, read our complete guide to cold plunge water maintenance.
Ice-Only Tubs
For a basic tub without filtration or an approved sanitation system, replacing the water after each use is a conservative approach.
If you reuse water, follow the manufacturer’s cleaning and sanitation instructions rather than relying on appearance or temperature alone.
Chiller Systems
Some plunge-specific chillers include filtration.
The Pod Company Standard Chiller includes a 20-micron filtration system.
However, a particle filter is not the same as a disinfectant.
A filtration system can remove debris while microorganisms remain in the water.
Follow the manufacturer’s approved sanitation program and water-change schedule.
Weekly Maintenance Checklist
For a frequently used garage plunge, establish a routine:
- Inspect water clarity, odor, and cleanliness before every session.
- Check hoses, valves, and fittings for leaks.
- Remove floating debris and clean the cover.
- Inspect filters and replace or clean them as directed.
- Test water chemistry when required by the sanitation system.
- Clean the tub and replace water at the appropriate interval.
- Dry the floor and inspect for condensation.
Do not mix water-treatment chemicals or add household bleach without equipment-specific instructions.
Preventing Biofilm
Biofilm can develop on tub walls and inside circulation hoses.
Periodic cleaning of the complete water-contact system is important.
Pay particular attention to fittings, filters, and low-flow areas.
If the water becomes cloudy, slimy, or develops an unusual odor, stop using the plunge until it has been properly cleaned and the sanitation problem resolved.
10. Combining a Cold Plunge With a Garage Sauna
A garage can be a practical place for both a sauna and cold plunge, especially if you want a dedicated recovery area without converting an indoor room.
However, combining them requires more planning than installing either one separately.
For the sauna installation itself, see our guide to setting up a sauna in a garage.
For a deep dive into the science and protocols of alternating heat and cold, read our guide to contrast therapy setups.
Plan Separate Equipment Zones
Keep the plunge away from the sauna heater, electrical controls, and any surfaces that must remain dry.
Maintain all manufacturer-required clearances.
A sauna can release heat and humidity into the garage, which may increase the cooling load on a nearby plunge chiller.
Do not place the chiller where hot sauna exhaust blows directly onto its condenser.
Electrical Capacity
A compact 120V infrared sauna and a 120V chiller may both use household voltage, but that does not mean they should share a circuit.
For example, a sauna drawing 1,500W and a chiller drawing 280W would create a combined nominal load of 1,780W before accounting for other equipment.
Circuit sizing must follow applicable code and the equipment’s actual electrical ratings.
Have an electrician evaluate the complete setup.
Ventilation and Moisture
Both activities can increase moisture in the garage.
A traditional sauna also needs its own manufacturer-specified ventilation arrangement.
Do not connect sauna ventilation to a random garage exhaust opening or compromise fire-rated walls.
Safe Transition Between Heat and Cold
Alternating sauna and cold-water immersion can produce rapid cardiovascular changes.
Avoid rushing directly from intense heat into near-freezing water.
Allow your breathing and balance to settle, enter the water gradually, and stop if you feel dizzy or unwell.
People with cardiovascular conditions, blood pressure problems, or other relevant medical concerns should seek medical advice before using contrast therapy.
For more background, see our cold plunge vs ice bath comparison.
Keep Towels and Dry Clothing Nearby
A small wall-mounted shelf or storage unit outside the wet area can hold towels and robes.
For towels and robes suitable for garage sessions, see our guide to the best sauna and cold plunge towels and robes.
11. Step-by-Step Garage Cold Plunge Setup
The following process works as a planning sequence for most portable and refrigerated garage installations.
Step 1: Choose the Location
Find a level area with enough room for the tub, safe entry and exit, and access to the drain.
Avoid vehicle travel paths, electrical panels, stored chemicals, and fuel-burning appliances.
Leave space to remove the cover and clean around the tub.
Step 2: Inspect the Floor
Check the concrete for significant cracking, settlement, or other damage.
If the floor is suspended or its structural condition is uncertain, obtain professional advice.
Do not assume every garage floor is a conventional slab on grade.
Step 3: Measure the Complete Setup
Measure the tub’s footprint and height.
If using a chiller, add its dimensions, ventilation clearances, hose routing, and filter access.
Mark the layout with painter’s tape before ordering.
Step 4: Choose the Tub
For a budget setup, consider the Ice Pod.
For a more permanent insulated installation, investigate the Ice Barrel 300.
Choose the tub based on your space, body size, water volume, and maintenance preferences.
Step 5: Plan Filling and Draining
Identify a water source and approved drain destination.
Purchase compatible hoses and fittings.
Test the drainage route before filling the tub completely.
If a pump is required, make sure its electrical installation is suitable for a wet environment.
Step 6: Prepare the Floor
Clean the concrete and remove debris.
Install a compatible protective mat if appropriate.
Keep the surrounding area clear of electrical cords, tools, and trip hazards.
Step 7: Assemble the Tub
Follow the manufacturer’s instructions.
Check all seals, valves, and fittings.
For the Ice Barrel 300, install the supplied drain-spout assembly according to Ice Barrel’s instructions, including the specified thread-sealing procedure.
Step 8: Perform a Partial-Fill Test
Add a small amount of water.
Inspect the bottom, seams, and drain connections.
Test the discharge hose.
Do not proceed until you are satisfied that the tub and drainage arrangement are secure.
Step 9: Fill to the Recommended Level
Fill gradually and monitor the process.
Leave enough room for water displacement when you enter.
Do not exceed the manufacturer’s fill limit.
Step 10: Set Up Cooling
For an ice-only installation, measure the starting water temperature and add ice gradually.
For a refrigerated setup, install the chiller, pump, filtration, and hoses according to the manufacturer’s instructions.
Verify the required water flow and electrical protection before operating the system.
Step 11: Prepare for Safe Use
Keep a towel, warm clothing, and a clear exit path nearby.
For initial sessions, have another adult present.
Enter slowly, keep your head above water, and avoid breath-holding.
Do not plunge while impaired by alcohol or drugs, and never use the plunge while a vehicle or other combustion engine is running in the garage.
Step 12: Test the Complete Routine
After a short initial session, drain or maintain the water according to your chosen system.
Inspect the surrounding floor.
Confirm that you can clean the tub and access every connection without moving a full vessel.
If the process is difficult or creates standing water, correct the setup before continuing.
12. Cost Breakdown: How Much Does a Garage Cold Plunge Cost?
The cost depends mainly on the tub and whether you use ice or a chiller.
The following are approximate US planning ranges for 2026, not guaranteed retail quotes.
| Expense | Budget ice-only setup | Chiller setup |
| Cold plunge tub | $80–$300 | $80–$1,200+ |
| Chiller | $0 | 600–1,500+ |
| Hoses and fittings | $20–$70 | $30–$150 |
| Protective floor mat | $25–$100 | $25–$100 |
| Waterproof thermometer | $10–$30 | $10–$30 |
| Initial ice | $10–$50+ | Usually unnecessary |
| Cleaning supplies | $15–$50 | $25–$100 |
| Estimated starting total | $160–$600+ | $770–$3,080+ |
These totals assume the existing garage is suitable.
Electrical upgrades, new plumbing, drainage modifications, slab repairs, permits, and professional labor can increase costs substantially.
Monthly Ice Costs
Suppose you use 20 pounds of purchased ice per session and plunge four times per week.
At an illustrative price of $0.20–$0.35 per pound:
- Cost per session: $4–$7
- Approximately 17 sessions per month
- Monthly ice cost: $68–$119
A hot garage or larger tub can increase ice requirements.
Monthly Chiller Electricity
Consider a 280W chiller compressor operating for an average of eight hours per day.
At an assumed residential electricity rate of $0.18/kWh:
0.28 kW × 8 hours × 30 days × $0.18 = $12.10 per month
This is an illustrative calculation, not a measured consumption figure.
The actual cost depends on compressor cycling, water volume, insulation, garage temperature, and pump consumption.
A continuously operating circulation pump adds electricity use beyond the compressor estimate.
Monthly Water Costs
An 80-gallon plunge refilled four times monthly uses 320 gallons.
At an illustrative combined water and sewer rate of $15 per 1,000 gallons:
320 ÷ 1,000 × $15 = $4.80
Actual utility rates and billing structures vary.
Is a Chiller Worth the Money?
If you plunge once or twice per week, ice may be the more economical choice.
If you plunge daily and purchase large quantities of ice, a chiller can become more attractive.
However, include the purchase price, pump, filtration, sanitation, electricity, and maintenance when comparing costs.
For budget refrigeration options, see our guide to cold plunge chillers under $1,000.
For additional options, see our guide to cold plunge chillers under $1,500.
13. Common Mistakes to Avoid
Mistake 1: Placing the Plunge Near a Running Vehicle
Never plunge in a garage where an engine or fuel-burning appliance is producing exhaust.
Carbon monoxide exposure is a serious hazard.
Mistake 2: Assuming Every Concrete Floor Is Suitable
Most sound slab-on-grade garage floors are practical candidates, but suspended slabs, damaged concrete, and unusual structures need evaluation.
Mistake 3: Buying a Chiller Before Checking Garage Temperatures
A small chiller may perform adequately in a 70°F garage but struggle in a 100°F garage.
Choose equipment for your actual climate and tub volume.
Mistake 4: Ignoring Winter Freezing
Water trapped inside a chiller can freeze and damage the equipment.
Follow the manufacturer’s winterization instructions.
Mistake 5: Draining Without a Plan
Do not assume every garage has a usable floor drain.
Identify an approved discharge destination before filling.
Mistake 6: Using an Extension Cord Across a Wet Floor
A refrigerated plunge needs an appropriate electrical connection.
Do not improvise unsafe wiring.
Mistake 7: Skipping Water Sanitation
Filtration and cold temperatures do not guarantee hygienic water.
Follow a proper maintenance and sanitation program.
Mistake 8: Blocking Garage Access
Do not position the tub where it obstructs required exits, the electrical panel, or safe vehicle movement.
14. Frequently Asked Questions
Can I put a cold plunge directly on a garage concrete floor?
Often, yes, if the slab is sound, properly supported, level, and suitable for the expected load.
A protective mat may help prevent abrasion, but it does not increase structural capacity.
If the slab is suspended or damaged, obtain professional advice.
Do I need a floor drain for a garage cold plunge?
No.
You can use a drain hose to route water to an approved drain.
A compatible transfer pump may be necessary if gravity drainage is not possible.
If you’d rather start with a portable option before committing to a permanent installation, see our best inflatable cold plunge roundup for apartments.
Will a cold plunge make my garage humid?
It can contribute to moisture through splashing, evaporation, and condensation.
Use a cover, dry wet surfaces, and maintain suitable ventilation.
Inspect nearby walls and stored belongings for persistent moisture.
Can I use a cold plunge in an unheated garage during winter?
Possibly, but freezing temperatures create risks for the tub, valves, hoses, and chiller.
Follow the manufacturer’s winterization instructions.
Do not assume continuous water circulation prevents freezing.
Is a 1/4 HP chiller enough for a garage plunge?
It may be sufficient for a compact, insulated tub in moderate temperatures.
However, cooling performance depends on the water volume, garage temperature, insulation, and the specific chiller’s rated capacity.
A very hot garage may require more cooling capacity.
Do I need a dedicated electrical circuit?
Not always.
It depends on the chiller’s electrical requirements and the existing circuit loads.
A qualified electrician can determine whether a dedicated circuit is necessary or advisable.
Can I install a sauna next to my garage cold plunge?
Potentially, yes, if the garage has sufficient space, electrical capacity, ventilation, and safe separation between equipment.
For the sauna installation itself, see our guide to setting up a sauna in a garage.
Is a garage cold plunge better than a bathroom cold plunge?
For many homeowners, a garage provides more room and easier water management.
A bathroom may be more convenient in winter and may already have suitable plumbing.
The better location depends on floor support, drainage, climate, available space, and electrical safety.
For a bathroom cold plunge setup, see our guide to setting up a cold plunge in a small bathroom.
15. Final Recommendations
For most US homeowners, a garage is one of the more practical locations for a cold plunge.
It offers more space than a bathroom and avoids the structural concerns associated with elevated apartment balconies.
But the installation still needs proper planning.
Best Starting Point: The Pod Company Ice Pod
Start with a portable tub and ice if you are unsure how often you will plunge.
This keeps the initial investment lower and allows you to test the garage layout, filling routine, drainage, and maintenance before adding refrigeration.
Best More Permanent Tub: Ice Barrel 300
The Ice Barrel 300 has a 35.5″ × 35.5″ footprint, approximately 77-gallon capacity, insulated construction, and chiller-ready ports.
Ice Barrel lists its empty weight at 61 pounds and filled weight at approximately 700 pounds.
It is worth considering if you want a compact, rigid plunge for a dedicated garage area.
Best Convenient Cooling Upgrade: The Pod Company Standard Chiller
The Pod Company Standard Chiller
The Standard Chiller is designed for cold plunging and may be suitable for a garage that stays below approximately 85°F for much of the year.
Its published specifications include a 1/3 HP compressor, 280W power rating, and 110V connection.
For hotter garages, evaluate higher-capacity options rather than assuming the smallest chiller will perform adequately.
Best DIY Chiller Option: Active Aqua 1/4 HP
Active Aqua 1/4 HP Water Chiller
This is a more technical option for buyers who are comfortable designing a compatible circulation system.
It is not a complete cold-plunge package, so account for pump sizing, hoses, filtration, sanitation, and the manufacturer’s intended-use requirements.
Accessories Worth Considering
For protecting the floor:
For cleaning up incidental spills:
RIDGID 6-Gallon Wet/Dry Shop Vacuum
For towels and robes suitable for garage sessions, see our guide to the best sauna and cold plunge towels and robes.
Our Recommended Setup Order
Start with the garage itself.
Confirm that the floor is suitable, the space is safe from vehicle exhaust and stored chemicals, and you have a reliable filling and drainage plan.
Then select the tub.
Use ice initially if you want to minimize cost and complexity.
Add a chiller only after you know your actual usage frequency, desired water temperature, and garage climate.
If you also plan to install a sauna, design the two systems together so electrical capacity, ventilation, moisture management, and equipment clearances are addressed from the beginning.
For the sauna installation itself, see our guide to setting up a sauna in a garage.
The best garage cold plunge is not the most expensive system. It is the one that fits your space, stays sanitary, drains safely, and maintains your preferred water temperature without creating electrical, moisture, or freezing problems.
This post contains affiliate links. If you buy through them, we may earn a commission at no extra cost to you.