Disclosure: This post contains affiliate links, including Amazon Associates links. If you buy through them, we may earn a commission at no extra cost to you. As an Amazon Associate I earn from qualifying purchases.
Bottom Line
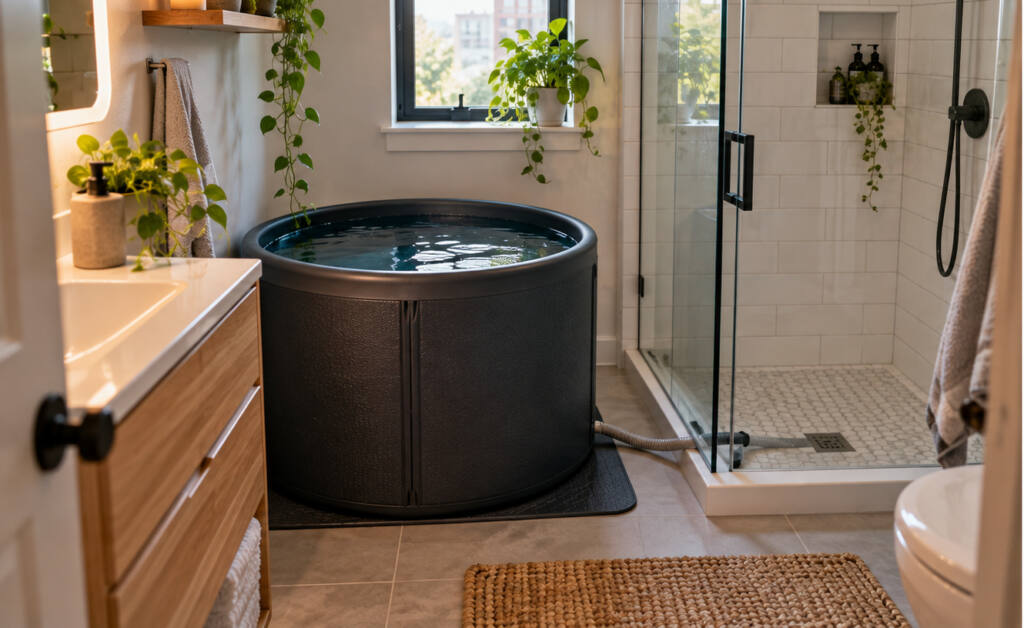
You can set up a cold plunge in a small bathroom, but floor strength, drainage, and water management matter more than the size of the tub.
For most US renters and homeowners, the most practical starting point is a compact portable cold plunge, such as The Pod Company Ice Pod, filled with tap water and cooled using ice. It avoids permanent plumbing modifications, requires no additional electrical equipment, and can be emptied and stored when necessary.
If you have a narrow bathroom with more length than width, The Pod Company Long Pod may be a better physical fit. However, its larger water capacity can create substantial weight, so the floor must be evaluated before installation.
Owners on cold plunge forums frequently mention that the Ice Pod works best as a first step before committing to a chiller. The most common complaint is that ice becomes expensive if you plunge more than three times per week, which is the point most people start considering refrigeration.
For frequent plunging, a compatible chiller can eliminate the need to buy bags of ice. But a chiller also introduces electrical requirements, hoses, heat output, ventilation needs, and additional leak risks.
Our recommendation: Start with an ice-only setup. Test filling, cooling, entering, draining, and cleaning the tub before investing in a permanent arrangement.
If your bathroom is upstairs, has questionable flooring, or lacks a safe drainage route, use your existing bathtub instead of adding a separate water-filled vessel.
For more compact plunge options, see our guide to the 3 best small cold plunges for apartments.
1. Can You Actually Cold Plunge in a Small Bathroom?
Yes, provided the bathroom can safely accommodate the weight, water, and space requirements.
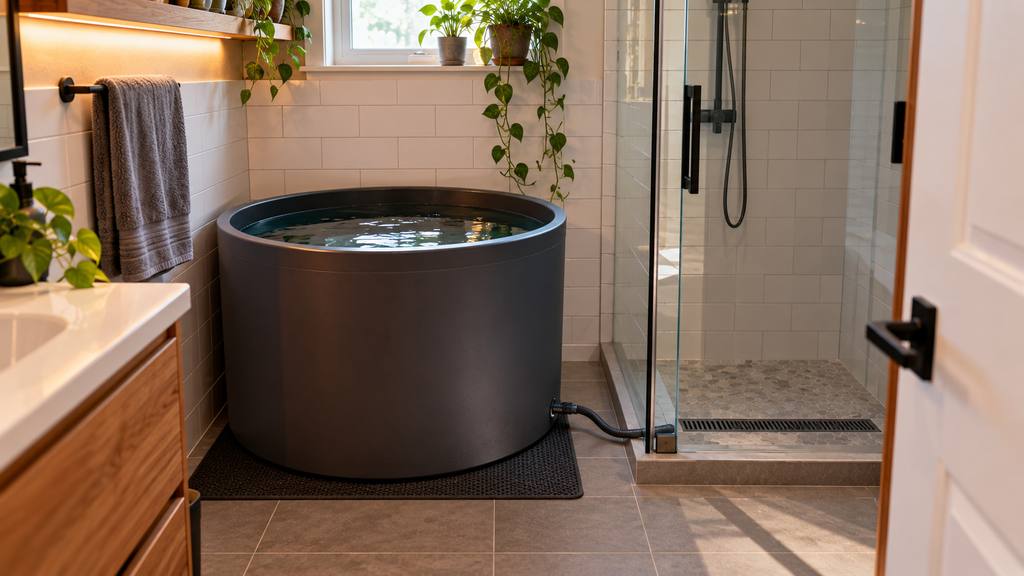
A typical small US bathroom might measure approximately 5′ × 8′. That sounds like plenty of space until you account for the toilet, sink, shower, door swing, and walking area.
The actual usable footprint may be only a few square feet.
Before purchasing a tub, evaluate four things.
Available Floor Space
Measure the clear floor area, not the entire bathroom.
A portable plunge needs room for the tub itself, but also for entering and exiting safely.
You should be able to step out without climbing over a toilet, hitting a vanity, or blocking the bathroom door.
Leave access to drain valves and hose connections.
If the tub must be moved every time you use the shower, think carefully about whether that routine will remain practical once it contains water.
Existing Drainage
Bathrooms have drains, but that does not mean every location is suitable for a plunge.
A shower drain is useful if the tub can discharge into it safely.
A bathroom with only a bathtub drain may require a longer hose or compatible transfer pump.
The critical question is not simply whether a drain exists.
It is whether you can move the entire water volume to that drain without flooding the room.
Water Access
You need a practical way to fill the tub.
For most bathrooms, a shower hose or faucet adapter is the simplest option.
Avoid carrying dozens of buckets through the house.
A 70-gallon tub filled using a 2-gallon bucket requires 35 trips.
That is not a convenient routine.
Lease, Condo, and Insurance Restrictions
Renters should review their lease and obtain written permission when required.
Even portable equipment may be restricted if it introduces substantial water loads or a risk of damage to neighboring units.
Condo owners should check HOA rules, particularly for upstairs bathrooms.
Homeowners have more flexibility, but structural, electrical, and plumbing requirements still apply.
A removable tub is not automatically an approved or safe installation.
2. What Size Cold Plunge Fits a Small Bathroom?
The best size depends on your available floor area, body size, preferred seated position, and the floor’s load-bearing capacity.
For a small bathroom, start by looking at tubs with a footprint of approximately 3′ × 3′ or less.
That is a useful shopping target, not a guarantee that a particular tub will fit or be structurally acceptable.
Real Cold Plunge Options to Consider
| Product | Approximate dimensions | Water capacity | Best bathroom situation |
| The Pod Company Ice Pod | Around 32″ diameter | Varies by version and fill level | Small round footprint |
| The Pod Company Long Pod | Around 62″ × 27″ | Up to approximately 126 gallons | Long, narrow bathroom |
| Ice Barrel 300 | Around 35.5″ × 35.5″ | Approximately 77 gallons | Larger supported floor area |
| Plunge Air | Around 61″ × 32″ | Depends on configuration | Larger bathrooms with room for accessories |
These are approximate planning figures. Verify the exact model’s current dimensions, fill capacity, and installation requirements before ordering.
Why Filled Weight Matters
Water weighs approximately 8.34 pounds per US gallon.
That means a relatively small plunge can become extremely heavy.
| Water volume | Water weight alone |
| 50 gallons | 417 lb |
| 60 gallons | 500 lb |
| 70 gallons | 584 lb |
| 80 gallons | 667 lb |
| 100 gallons | 834 lb |
| 126 gallons | 1,051 lb |
These numbers do not include the tub, the person using it, or accessories.
For example, an 80-gallon plunge containing 667 pounds of water could exceed 900 pounds of combined weight when occupied, depending on the tub and user.
That load is concentrated in a relatively small area.
Can a Second-Floor Bathroom Support It?
Possibly, but you should not guess.
Floor capacity depends on joist size, spacing, span, condition, load location, and how the tub transfers weight to the structure.
Residential floor design loads cannot be used as a simple permission slip to install any heavy object.
For an upstairs bathroom, have a qualified structural engineer assess the proposed installation.
A ground-floor bathroom with a properly supported concrete slab is often a more straightforward candidate, although waterproofing and drainage still matter.
Do Not Forget Entry and Exit
A tall barrel-style plunge may have a compact footprint but require more effort to climb into.
A lower, longer tub may be easier to enter but consume more floor area.
Consider your mobility, the location of nearby fixtures, and whether you have a stable, unobstructed exit route.
Apartment dwellers in cold plunge communities consistently report that the biggest surprise is not the tub itself but the water weight. Several owners mention having to relocate a filled tub after discovering their original placement was not structurally suitable.
3. Water Source and Drainage
This is the part of the installation that determines whether a bathroom plunge is convenient or frustrating.
You may enjoy a five-minute cold plunge, but you will not enjoy spending an hour dealing with hoses and wet floors afterward.
Filling the Tub
The simplest method is usually a compatible hose connected to the shower or sink.
You may need a faucet adapter.
Choose fittings designed for the existing plumbing and use appropriate backflow protection where required.
Before filling the tub, test the hose with a small amount of water.
Check for leaks at the faucet connection and along the hose.
Never leave the tub filling unattended.
How Much Water Should You Add?
Follow the manufacturer’s recommended fill level.
Do not fill the tub to the top before entering.
Your body displaces water, causing the level to rise.
A tub filled too high can overflow when you sit down, especially if the floor is uneven.
Draining Into a Shower
If the tub has a bottom drain valve, you may be able to attach a hose and direct water into the shower.
For gravity drainage, the hose outlet must be lower than the water level, and the route must allow water to flow.
Keep the hose securely positioned.
Test the drain with a small amount of water before emptying the entire tub.
A shower drain may handle normal shower flow but still struggle with rapid discharge from a large vessel.
Drain gradually and remain present.
What If the Drain Is Higher Than the Tub Outlet?
You may need a compatible water-transfer pump.
Select a pump suitable for the intended water-transfer application.
If the pump is electrically powered, follow its safety instructions and use an appropriate protected electrical supply.
Never operate damaged electrical equipment around standing water.
Avoid These Drainage Mistakes
Do not run a loose hose across a hallway.
Do not discharge water where it can reach electrical outlets or damage flooring.
Do not assume a sink will accept unrestricted high-volume pumping.
Do not leave the tub draining unattended.
And do not rely on a bathroom floor mat to contain an accidental 70-gallon spill.
4. Floor Protection and Weight Distribution
Bathroom flooring needs protection from splashing, condensation, and equipment movement.
However, a protective mat does not increase the structural capacity of the floor.
What Type of Floor Is Best?
A properly constructed tiled floor over an appropriate waterproof assembly is generally a better candidate than carpet, laminate, or damaged vinyl.
But tile alone does not establish that the floor is waterproof or structurally strong enough.
Check for cracked grout, loose tiles, damaged sealant, and signs of existing moisture problems.
Address those issues before installing the plunge.
Using a Floor Protection Mat
A non-slip rubber mat can help protect the finished floor from scuffs and provide a defined equipment area.
One real option to investigate is a Rubber-Cal rubber utility floor mat, selected in a size and thickness appropriate for the tub.
Avoid soft foam that compresses unevenly under a heavy tub unless the manufacturer approves it.
The base should remain stable and level.
Weight Distribution
A wide, continuous base may spread contact pressure more evenly than a small number of feet.
However, the way the weight transfers to the building depends on the actual tub construction and floor structure.
Do not assume a plywood platform solves an overloaded floor.
A platform can change the contact area without increasing the floor’s structural capacity.
Add a Leak Sensor
A small water-leak alarm can provide an early warning if a connection begins leaking.
The Govee Wi-Fi Water Sensor is a real product worth considering for this purpose.
Place the sensor where leaking water is likely to collect.
A leak alarm is only a backup. It does not replace waterproofing, inspections, or safe drainage.
5. Temperature Control: Ice vs. Chiller
You have two main options for cooling the water.
For a first-time bathroom installation, ice is usually simpler.
Option A: Using Ice
Fill the tub with cold tap water.
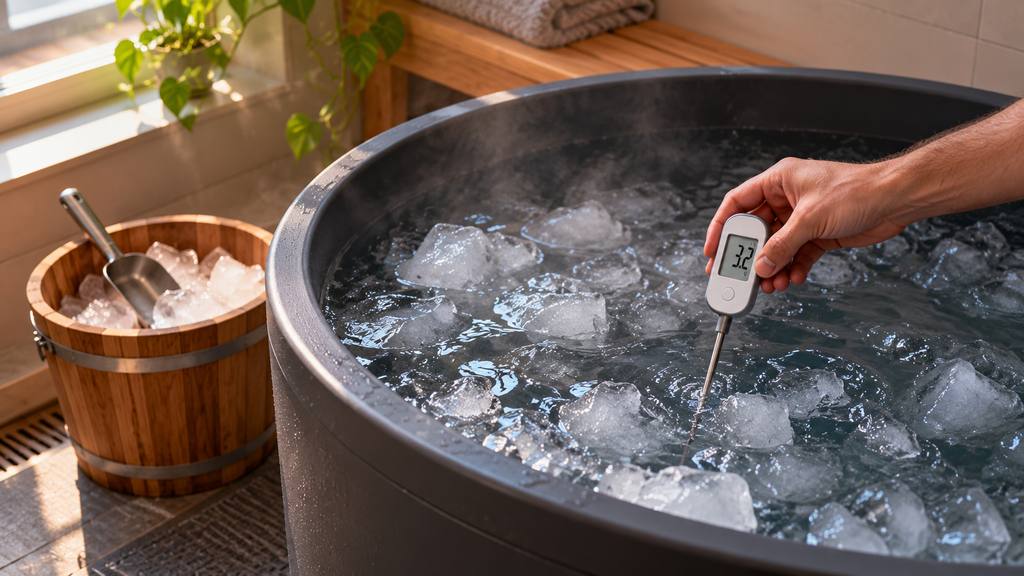
Measure the starting temperature with a suitable waterproof thermometer.
Add ice gradually, circulate the water gently, and check the temperature again.
The amount of ice required depends on the water volume, starting temperature, room temperature, target temperature, and heat entering the tub.
For example, cooling 60 gallons of water from 70°F toward 50°F can require roughly 50 pounds of ice under simplified ideal conditions.
Actual requirements can be higher.
Do not treat that estimate as a fixed recipe.
How Cold Should the Water Be?
You do not need near-freezing water to experience cold immersion.
For a beginner, water around 55– 60°F may already feel intensely cold.
Start conservatively, use brief exposures, and avoid chasing the lowest possible number.
Cold water can cause involuntary gasping, rapid breathing, dizziness, and cardiovascular stress. People with cardiovascular disease, blood pressure problems, or other relevant medical conditions should seek medical guidance before starting.
Never practice breath-holding or submerge your head during a plunge.
Option B: Using a Chiller
A chiller cools the water mechanically.
It is useful if you plunge frequently and do not want to purchase ice every session.
Real options include:
The Pod Company Standard Chiller: A plunge-oriented system intended to work with compatible tubs and circulation equipment.
The Pod Company Standard Chiller
Active Aqua 1/4 HP Water Chiller: A water chiller used in hydroponic and other cooling applications. It is not a complete plug-and-play plunge system and requires suitable pumps, hoses, filtration, and installation.
Active Aqua 1/4 HP Water Chiller
For a detailed comparison, see our guide to cold plunge chillers under $1,500.
For budget chiller options, see our guide to cold plunge chillers under $1,000.
Chiller Placement in a Small Bathroom
A chiller needs space for airflow.
It also releases heat into the room.
Do not place it in a closed vanity cabinet unless the manufacturer specifically permits that arrangement.
Check the unit’s required clearances and humidity limitations.
A cramped, poorly ventilated bathroom can reduce cooling performance and increase condensation problems.
Electrical Requirements
A chiller typically uses standard US household power, but voltage and amperage depend on the specific model.
Follow the manufacturer’s instructions for circuit capacity, grounding, and GFCI protection.
Do not use an ordinary extension cord across a wet bathroom floor.
Keep electrical connections away from splash zones.
A licensed electrician should assess any new outlet or circuit work.
The Pod Company chiller owners frequently note that the unit runs quietly in a bathroom but produces noticeable waste heat in a small enclosed space. The most common tip is to leave the bathroom door cracked while the chiller operates to help with airflow.
6. Water Maintenance and Sanitation
Cold water is not automatically clean water.
Every time you enter the tub, you introduce skin oils, sweat, microorganisms, and possibly residue from soaps or lotions.
A portable plunge needs a maintenance plan.
Ice-Only Tubs Without Filtration
If the tub has no filtration or approved sanitation system, use fresh water frequently.
For occasional use, emptying and cleaning after each session is a conservative approach.
For repeated use over a short period, follow the tub manufacturer’s guidance and assess contamination risk.
Do not assume that water is safe simply because it looks clear.
Chiller Systems With Filtration
Some chiller systems include or support water filters.
Filters can remove debris and particles, but filtration is not the same as disinfection.
A system designed for multi-day or multiweek water use needs a manufacturer-approved sanitation and maintenance approach.
Follow the specified filter replacement schedule and water-treatment instructions.
Do not add household chemicals without confirming compatibility with the tub, seals, pump, and chiller.
A Practical Maintenance Routine
Before every session, inspect the water and check for leaks.
After use, remove debris, dry splashes, and close the cover according to the manufacturer’s instructions.
At the required maintenance interval, clean filters, check the water treatment if applicable, and drain, wash, rinse, and refill the tub.
If the water becomes cloudy, develops an odor, or feels slimy, stop using it until the problem has been corrected.
Preventing Biofilm
Biofilm can form on wet surfaces and inside hoses.
This is one reason that simply topping up water indefinitely is a poor strategy.
Periodically inspect and clean the interior walls, fittings, hoses, and circulation components according to the manufacturer’s instructions.
7. Bathroom-Specific Challenges: Humidity, Condensation, and Mold
A small bathroom already experiences high humidity from showers.
Adding a cold plunge creates another source of water and potentially condensation.
Why Condensation Happens
When the surface of a plunge tub is colder than the surrounding air’s dew point, moisture can condense on the outside.
This can make the floor damp even when no fitting is leaking.
Insulated tubs may reduce condensation, but they do not guarantee that the exterior will remain dry.
Improve Bathroom Ventilation
Use a properly installed bathroom exhaust fan that vents to an approved location, typically outdoors.
Do not vent moist air into an attic or wall cavity.
If your fan is weak or poorly ducted, consider having it evaluated before installing a permanent plunge.
Keep the Floor Dry
After each session, wipe up splashes and inspect the area around the tub.
Check underneath the tub when possible.
Avoid installing the vessel so tightly against a wall that you cannot inspect or clean the surrounding surfaces.
Mold Prevention
The most effective approach is routine moisture control.
Repair leaks promptly, dry wet surfaces, maintain ventilation, and clean hidden areas.
If you notice persistent dampness, musty odors, or visible mold, correct the moisture problem rather than simply covering it with a mat.
Bathroom cold plunge owners consistently mention that condensation on the outside of the tub is more common than actual leaks. The most common fix is placing a rubber mat underneath and running the bathroom exhaust fan during and after every session.
8. Step-by-Step Setup Process
Step 1: Measure the Bathroom
Measure the usable floor area.
Include the toilet, vanity, shower door, and entrance door in your layout.
Use painter’s tape to mark the tub footprint.
Check whether you can comfortably enter and exit.
Step 2: Confirm the Floor Can Support the Load
Calculate the expected water weight.
Multiply the planned number of gallons by 8.34.
Add the tub weight and user weight.
If the bathroom is upstairs or the structure is uncertain, obtain a structural assessment before filling.
Step 3: Review Permissions
Renters should check lease restrictions and obtain written approval where required.
Condo owners should review HOA requirements.
Determine whether any planned electrical or plumbing modifications require permits.
Step 4: Choose the Tub
For a compact round footprint, consider The Pod Company Ice Pod.
For a long, narrow space, consider the Long Pod.
For a more rigid, insulated option, consider the Ice Barrel 300.
Choose based on the bathroom layout and verified load capacity, not simply on the largest advertised water capacity.
Step 5: Plan the Water Source
Identify the faucet or shower connection.
Buy compatible hoses and adapters.
Test the connections before filling.
Step 6: Plan the Drainage
Identify where the water will go.
Make sure the drain hose reaches and can be secured.
If a transfer pump is necessary, select one suitable for the job and follow its electrical safety requirements.
Step 7: Prepare the Floor
Clean and inspect the flooring.
Repair existing water damage or failed sealant.
Install a compatible protective mat if appropriate.
Step 8: Assemble the Tub
Follow the manufacturer’s instructions.
Check the frame, seams, drain valve, and hose connections.
Make sure the tub is stable and level.
Step 9: Perform a Leak Test
Add a small amount of water.
Inspect the bottom and every connection.
Test the drain.
Do not fill the tub completely until the partial-fill test is successful.
Step 10: Fill and Cool the Water
Fill to the recommended level.
Measure the water temperature.
Add ice gradually, or operate the chiller according to its instructions.
Do not leave filling or draining unattended.
Step 11: Prepare for Safe Entry
Place a dry towel within reach.
Keep the floor clear and non-slip.
Have another adult nearby, particularly during initial sessions.
Enter gradually and keep your head above water.
Leave immediately if you experience dizziness, chest discomfort, difficulty breathing, or other concerning symptoms.
Step 12: Test the Complete Routine
Complete a brief session.
Then drain, clean, and dry the setup.
Evaluate whether the process is practical.
If draining takes too long, water collects beneath the tub, or entering is awkward, address those issues before making the setup permanent.
9. Cost Breakdown: What Does a Bathroom Cold Plunge Cost?
A basic ice-only plunge can be relatively affordable.
A complete refrigerated system is a larger investment.
The following are approximate US planning ranges rather than guaranteed current retail quotes.
| Expense | Budget ice setup | Chiller setup |
| Portable tub | $80–$250 | $80–1,$150+ |
| Chiller | $0 | $600–$1,500+ |
| Hoses and adapters | $15–$60 | $30–$150 |
| Floor protection | $20–$80 | $20–$80 |
| Waterproof thermometer | $10–$30 | $10–$30 |
| Leak sensor | $15–$60 | $15–$60 |
| Initial ice | $10–$40+ | Usually unnecessary |
| Estimated starting cost | $150–$520+ | $755–$2,970+ |
These figures exclude structural evaluations, electrical work, plumbing changes, waterproofing repairs, and permits.
Those expenses can be significant if the bathroom is not already suitable.
Monthly Ice Costs
Suppose you plunge four times per week and use 20 pounds of purchased ice per session.
At an illustrative ice price of $0.20–$0.35 per pound:
- Ice per session: $4–$7
- Approximately 17 sessions monthly
- Monthly ice cost: $68–$119
If you require 40 pounds each time, the cost could be approximately $136–$238 per month at those prices.
Your actual usage may be lower or higher.
Monthly Chiller Electricity Costs
Chiller energy use varies with insulation, water temperature, ambient temperature, and operating schedule.
For illustration, suppose a complete chiller setup consumes an average of 1.5 kWh per day.
At an assumed electricity price of $0.18 per kWh:
1.5 × 30 × $0.18 = $8.10 per month
This is a calculation example, not a verified consumption specification for a particular chiller.
A chiller operating frequently in a warm bathroom may use considerably more electricity.
Monthly Water Costs
An 80-gallon tub emptied and refilled four times per month uses 320 gallons.
At an illustrative combined water and sewer cost of $15 per 1,000 gallons:
320 ÷ 1,000 × $15 = $4.80
Local rates vary, and some utilities charge fixed fees in addition to usage.
Which Setup Is Cheaper?
Ice usually wins on initial cost.
A chiller can become more economical for frequent users who otherwise purchase substantial quantities of ice, but its initial price, maintenance, and electricity consumption must be included.
Do not buy a chiller solely because a marketing page claims it will pay for itself in a particular number of months.
Calculate using your actual ice costs and frequency.
10. Common Mistakes to Avoid
Buying a Tub Before Measuring
The advertised dimensions do not include every clearance you need.
Measure the tub, entry space, drain access, and walking area.
Ignoring Filled Weight
A tub containing 100 gallons of water holds approximately 834 pounds of water before adding anything else.
Do not place that load on an uncertain floor.
Assuming the Shower Drain Can Handle Everything
A large volume of water released too quickly can overflow a shower pan or expose a blocked drain.
Control the flow and supervise drainage.
Using an Extension Cord for the Chiller
Keep electrical equipment properly installed and protected.
Do not run ordinary extension cords through wet bathroom areas.
Placing a Chiller in a Closed Cabinet
Chillers reject heat into the surrounding air.
Poor ventilation can reduce performance and cause overheating.
Reusing Water Without Sanitation
Cold water can still become contaminated.
Follow a realistic cleaning, filtration, and disinfection schedule.
Forgetting Condensation
A cold tub can create wet surfaces even without leaking.
Inspect and dry the surrounding floor.
Starting With Water That Is Too Cold
Beginners do not need near-freezing water.
Start with a manageable temperature, keep sessions short, and prioritize controlled breathing and safe exit.
Experienced cold plungers frequently warn against buying a large tub first and then figuring out the installation. The most common advice is to start with the smallest tub that allows a comfortable seated position and upgrade only if you actually need more room.
11. Frequently Asked Questions
Can I put a cold plunge inside my shower?
Possibly. The shower must have enough space, a safe entry and exit route, and sufficient structural support.
A waterproof shower pan is not automatically designed to carry the concentrated weight of a full portable plunge.
Check the pan and supporting structure before installation.
If you have a balcony instead of a bathroom, see our guide to setting up a cold plunge on a small balcony.
Can I put a cold plunge in an upstairs apartment bathroom?
Possibly, but you should obtain a structural assessment rather than assuming the floor can support it.
A filled plunge can impose hundreds of pounds of additional load in a small area.
Lease and condo restrictions may also apply.
How much ice do I need for a small cold plunge?
It depends on the water volume, starting temperature, target temperature, and surrounding conditions.
Cooling a moderate-size tub substantially can require tens of pounds of ice.
Start with measured water temperature and add ice gradually.
Do I need a chiller?
No.
For occasional use, an ice-only plunge is often simpler and less expensive.
A chiller becomes more attractive when you plunge frequently and want consistent temperatures without repeated ice purchases.
How often should I change the water?
Follow the tub and sanitation-system manufacturer’s instructions.
For a portable tub without filtration or an approved sanitation system, frequent water changes are advisable.
Do not assume clear-looking water is safe.
Will a cold plunge cause mold in my bathroom?
It can contribute to moisture problems if water remains on the floor, condensation is trapped, or ventilation is inadequate.
Keep the bathroom ventilated, dry wet surfaces, and inspect beneath the tub regularly.
Can I use my existing bathtub for cold plunging?
Yes. For many people, this is the simplest bathroom solution.
You can use cold tap water and ice without adding a second large vessel.
Avoid overfilling, check the temperature, and make sure you can enter and exit safely.
Is it safe to cold plunge alone?
Having another adult nearby is safer, particularly when starting.
Cold immersion can trigger involuntary gasping, rapid breathing, dizziness, and cardiovascular stress.
Do not submerge your head, hold your breath underwater, or use the plunge after drinking alcohol. Anyone with relevant medical conditions should consult a healthcare professional first.
12. Final Recommendations
The best bathroom cold plunge is not necessarily the most expensive or the coldest.
It is the setup you can safely support, fill, use, drain, clean, and maintain without creating ongoing water problems.
Best for Most Small Bathrooms: The Pod Company Ice Pod
Its compact, portable design makes it a reasonable starting point for buyers who want to try cold plunging without committing to permanent plumbing or a refrigeration system.
Start with ice, verify the filled weight, and test the drainage routine before purchasing additional equipment.
Best for Long, Narrow Bathrooms: The Pod Company Long Pod
Its elongated shape may fit some bathrooms better than a round plunge.
However, the potentially larger water volume requires careful consideration of structural loading and water changes.
Best for a More Permanent Setup: Ice Barrel 300
The Ice Barrel 300 is a rigid, insulated plunge with a compact square footprint and approximately 77-gallon capacity.
It is more appropriate for a bathroom with verified floor support and enough space to access the tub safely.
Best Upgrade for Frequent Use: A Compatible Chiller
The Pod Company Standard Chiller
Active Aqua 1/4 HP Water Chiller
A chiller can reduce dependence on purchased ice, but it should be installed only after confirming electrical safety, airflow, hose compatibility, drainage, and maintenance requirements.
For chiller options, see our guide to cold plunge chillers under $1,500.
Accessories Worth Buying
A waterproof thermometer helps you avoid guessing at the water temperature.
ThermoPro Waterproof Digital Thermometer
A leak alarm adds another layer of protection against unnoticed water problems.
A quick-drying towel makes repeated sessions easier in a small bathroom. See our guide to the best sauna and cold plunge towels and robes.
Before You Buy Anything
Ask yourself three questions:
- Can my bathroom floor safely support the filled tub and occupant?
- Can I fill and drain the tub without flooding or damaging the room?
- Can I keep the water sanitary and the surrounding bathroom dry?
If any answer is uncertain, resolve it before purchasing equipment.
If the bathroom cannot safely support a separate plunge, using the existing bathtub is often the better choice.
For more compact plunge options, see our guide to the 3 best small cold plunges for apartments.
For a practical explanation of cold plunge versus ice bath benefits and limitations, see our cold plunge vs ice bath comparison.
And if you are considering pairing cold plunging with a compact sauna, see our guide to the 5 best infrared saunas for apartments.
For most small-home buyers, a portable ice-only tub is the best place to start—but only after verifying structural support, drainage, and safe access. Add a chiller when your actual usage justifies the extra equipment.
Disclosure: This post contains affiliate links, including Amazon Associates links. If you buy through them, we may earn a commission at no extra cost to you. As an Amazon Associate I earn from qualifying purchases.