Disclosure: This article contains affiliate links, including Amazon Associates links. If you purchase through them, we may earn a commission at no extra cost to you.
A DIY cold plunge for apartment living can cost considerably less than a commercial refrigerated tub, but the biggest challenges are not keeping the water cold—they are supporting the weight, preventing leaks, and managing electricity safely.
For renters and small-space homeowners, building a cold plunge is appealing because you can choose the tub size, control the budget, and avoid permanent plumbing modifications.
A basic ice-cooled setup can cost a few hundred dollars or less. You may already own some of the necessary equipment, such as a thermometer, a suitable container, or a small utility pump.
However, not every popular DIY method belongs in an apartment.
A chest freezer converted into a water-filled plunge is a familiar internet project, but ordinary chest freezers are not designed to hold bathwater or accommodate a person. The combination of electricity, water, improvised waterproofing, and concentrated floor weight creates serious risks.
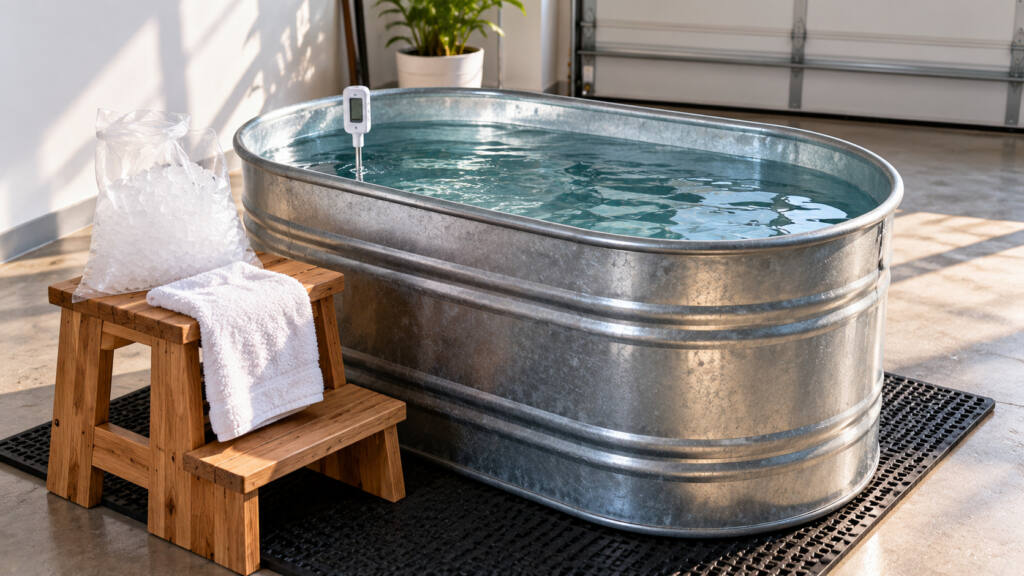
An insulated stock tank or suitably sized cooler is generally a more straightforward DIY option, provided the container is intended to hold water, the supporting structure is suitable, and you have a reliable drainage plan.
This guide compares three common DIY approaches, explains realistic costs and operating requirements, and shows how to plan an apartment setup without permanent plumbing.
Bottom Line: What’s the Best DIY Cold Plunge for an Apartment?
For most apartment dwellers, the best DIY cold plunge is a compact, water-rated plastic stock tank or large insulated container cooled with ice—not a converted chest freezer. A stock tank avoids the most serious electrical hazards of putting a person into an appliance designed for frozen food, and it can be drained with a hose or suitable utility pump. A chest freezer has built-in insulation and refrigeration, but an external temperature controller alone cannot make an ordinary freezer safe for human immersion. Unless a system has been specifically engineered, electrically evaluated, and approved for that use, do not enter a water-filled chest freezer. Whatever container you choose, obtain building approval where required and confirm that the floor can safely support the filled tub and occupant before starting.
Quick Comparison: Three DIY Cold Plunge Methods
| Feature | Chest freezer conversion | Stock tank | Large hard-sided cooler |
| Typical initial equipment budget | Around $250–$800+ | Around $100–$350 | Around $150–$600+ |
| Cooling method | Built-in refrigeration, but unsafe for immersion without purpose-designed engineering | Ice or compatible external chiller | Ice |
| Electrical requirements | Powered refrigeration; substantial electrical safety concerns | None with ice | None with ice |
| Portability | Poor | Moderate when empty | Depends on size |
| Insulation | Typically substantial | Usually needs added insulation | Often insulated |
| Drainage | Not designed for bathwater disposal | Drain fitting or utility pump | Drain plug or utility pump |
| Apartment suitability | Not recommended as an occupied plunge | Conditional on floor support and permission | Conditional on dimensions and floor support |
| Main limitation | Electrical and structural hazards | Weight, drainage, and space | Limited usable interior space |
These are illustrative equipment budgets, not verified retail quotes. They exclude ice, water, optional refrigeration, structural assessment, and any required electrical work.
Option 1: The Chest Freezer Method
Why People Consider Chest Freezers
A chest freezer seems like a logical starting point for a refrigerated cold plunge.
It already has an insulated cabinet, a compressor, and a thermostat-controlled refrigeration system.
Used units can sometimes cost less than a commercial water chiller, and a large freezer may appear roomy enough for a seated adult.
That combination explains why freezer conversions are popular in DIY discussions.
But a freezer’s ability to keep food frozen does not mean it can safely operate as a bathtub.
Why a Chest Freezer Is Not a Safe DIY Bathtub
A conventional chest freezer is engineered to hold packaged food and air—not hundreds of gallons of water and an adult occupant.
Potential hazards include:
- Electrical shock or electrocution if water reaches energized components or a fault develops.
- Cabinet deformation, seam failure, or leakage from sustained water pressure.
- Damage to refrigeration components from modifications or corrosion.
- Water entering flooring, walls, or neighboring apartments.
- Unsafe entry and exit over high freezer walls.
- Freezing-related expansion that can damage the cabinet.
A food-grade sealant does not convert a freezer into a certified water-containing vessel. Likewise, unplugging the appliance immediately before entry is not a complete safety strategy, because faults, wiring arrangements, and unintended reconnection remain concerns.
An external temperature controller is necessary to limit overcooling in a properly engineered freezer-based system, but it is not sufficient to make a conventional chest freezer safe for bathing.
Owners who experiment with freezer conversions frequently focus on temperature control rather than the appliance’s original electrical and structural design, so treat thermostat installation as only one small part of a much larger safety assessment.
What an External Thermostat Actually Does
An external controller, such as an Inkbird temperature controller, measures temperature through a probe and switches connected equipment according to a programmed setpoint.
Inkbird External Temperature Controller
For refrigeration applications, a compatible controller can help prevent the water from being cooled below the intended temperature and reduce the risk of ice formation.
However, it does not provide a certified waterproof enclosure, correct grounding, adequate electrical isolation, structural reinforcement, or a safe means of human entry.
Do not treat an ordinary plug-in controller as a substitute for equipment designed and approved for cold-water immersion.
The Weight Problem
A 15-cubic-foot freezer has an internal volume of approximately 112 gallons, but that is not a usable water-capacity specification. Insulation, interior geometry, safe fill levels, and structural limits all matter.
At 85 gallons, the water alone would weigh approximately 709 pounds.
Add a freezer weighing perhaps 100–200 pounds and a 180-pound occupant, and the total could exceed 1,000 pounds.
Those freezer weights are illustrative, not specifications for a particular model.
Even a ground-level installation needs a suitable supporting surface.
For an upstairs apartment, a freezer conversion is particularly inappropriate without extensive engineering review—and the electrical hazards remain regardless of floor capacity.
Our Recommendation
Do not build an occupied chest-freezer plunge from an ordinary household freezer.
If you want automated cooling, use a purpose-built cold plunge chiller with a compatible water-rated tub and manufacturer-approved electrical and plumbing connections.
For a budget-focused comparison, see cold plunge chillers under $1,000.
Option 2: The Stock Tank Method
Why a Stock Tank Is a Better DIY Starting Point
Stock tanks are designed to hold water.
They are commonly used for livestock watering and are available in plastic or galvanized steel.
Some models have rounded shapes and dimensions suitable for seated immersion, although not every stock tank is designed for human bathing.
Unlike a chest freezer, a stock tank does not combine an energized refrigeration appliance with the water you’re sitting in.
When cooled with ice, it requires no electrical connection.
That makes it a more straightforward DIY approach.
Plastic vs. Galvanized Steel
Plastic stock tanks are generally lighter when empty, resist rust, and may be easier to handle during a move.
Galvanized steel tanks can be rigid and durable, but their surfaces may be less comfortable, and the metal conducts heat readily.
Both need stable support and appropriate drainage.
Check that the selected container is suitable for prolonged water storage and the intended temperature range.
Do not drill, cut, or modify the tank in ways that compromise its structural integrity.
How to Insulate a Stock Tank
A stock tank without insulation will gain heat from the surrounding room.
You can improve temperature retention by using a removable, properly fitted insulated cover and suitable exterior insulation that does not trap moisture against the building.
Avoid improvised insulation that creates mold-prone cavities or obstructs access to the drain.
A cover can reduce heat transfer and keep debris out, but it does not replace water sanitation.
How to Drain It
If the tank has a suitable drain fitting, connect a compatible hose and route it to an approved drain.
Otherwise, use a utility pump rated for the application.
Choose a pump with suitable hose connections, electrical protection, and manufacturer-approved operating conditions.
Never run a pump dry unless its instructions specifically allow it.
Do not operate an electrical pump while someone is in the plunge.
Where a Stock Tank Works Best
A stock tank is most realistic in a suitable ground-level utility area, garage, or large bathroom with confirmed floor support.
It is not automatically safe in a small shower.
Even a 50-gallon fill contains approximately 417 pounds of water before adding the tank and occupant.
For bathroom-specific planning, see our guide to a cold plunge in a small bathroom.
Option 3: The Cooler Method
Can a Large Cooler Work as a Cold Plunge?
A large hard-sided cooler offers built-in insulation and often includes a drain plug.
That makes it appealing for a simple ice-cooled setup.
Brands such as Coleman and YETI sell insulated coolers, although many conventional models are too narrow or shallow for comfortable adult immersion.
The main limitation is usable interior space.
A cooler advertised as holding a certain number of quarts may not provide enough width or depth for a person to sit safely.
Advantages
A suitable cooler may retain cold temperatures better than an uninsulated stock tank.
It also avoids the need for powered refrigeration.
The drain plug may simplify emptying, depending on its location and whether a hose can be attached.
Disadvantages
Large premium coolers can be expensive.
Their thick insulation reduces interior dimensions relative to the exterior footprint.
Many have high sides, awkward entry, or lids that are unsuitable for a bathing application.
Do not use a cooler with a person inside unless its construction, load-bearing capability, and intended use have been confirmed by the manufacturer.
Never close or latch a lid while a person is inside.
Who Should Consider This Method?
The cooler method is most useful when you already own a suitably sized, water-rated container and can confirm it is appropriate for the intended use.
Buying an expensive cooler specifically to convert it may provide poor value compared with a purpose-built portable cold plunge.
For many renters, a commercial inflatable or folding tub is simpler.
The Biggest DIY Challenges and How to Solve Them
A DIY plunge may be inexpensive to purchase, but the practical problems are largely the same as those of a commercial tub.
The most important are weight, drainage, sanitation, and the amount of space the installation occupies.
1. Weight: Calculate the Complete Occupied Load
Water weighs approximately 8.34 pounds per US gallon.
That makes even a relatively small plunge much heavier than most people expect.
| Water volume | Water weight | Water plus 180-lb occupant |
| 30 gallons | 250 lb | 430 lb |
| 40 gallons | 334 lb | 514 lb |
| 50 gallons | 417 lb | 597 lb |
| 60 gallons | 500 lb | 680 lb |
| 80 gallons | 667 lb | 847 lb |
| 100 gallons | 834 lb | 1,014 lb |
These figures exclude the container, insulation, and accessories.
A 50-gallon stock tank with a 180-pound occupant could easily impose more than 600 pounds on the supporting floor.
The actual distribution of that load depends on the container’s base and the floor structure.
Do not assume that spreading the weight over a rubber mat makes an inadequate floor safe.
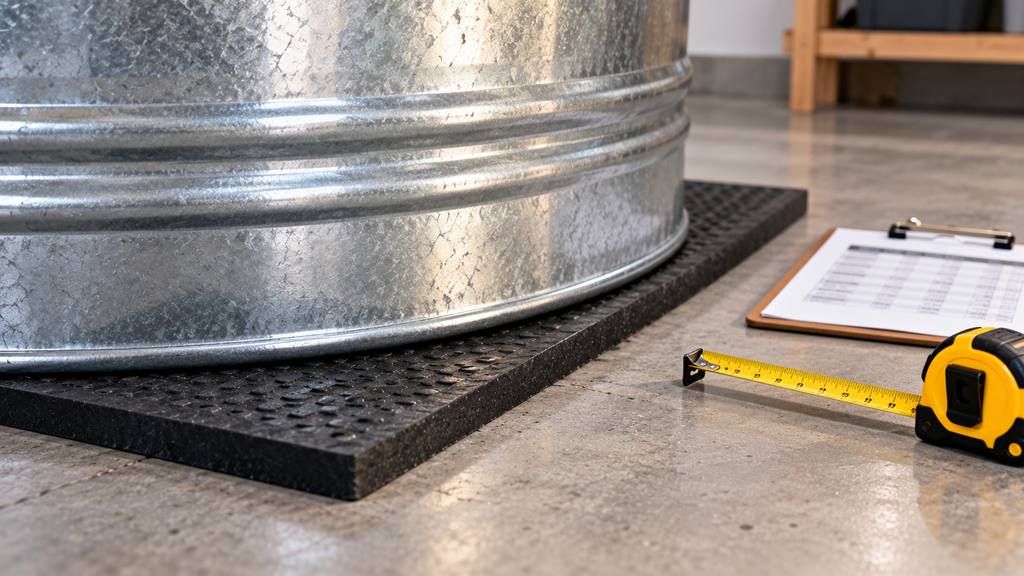
Use our cold plunge weight calculator to estimate the occupied weight.
For an upstairs apartment or an uncertain supporting structure, obtain permission and have a qualified structural professional evaluate the proposed installation.
2. Drainage: Where Will the Water Go?
A DIY plunge must have a drainage plan before the first fill.
In an apartment, the simplest destination is often an existing bathtub, shower, or utility drain.
However, the discharge must be controlled, and the plumbing must be capable of handling it.
Gravity Drainage
A tank with a low-mounted outlet can sometimes drain through a hose into a lower drain.
Secure the hose so it cannot slip out or flood the room.
If the destination is higher than the outlet, gravity drainage will not work.
Siphon Drainage
A siphon may work when the hose outlet is lower than the water surface and the hose is properly primed.
It becomes less effective as the water level drops and may leave residual water in the bottom.
Use an appropriate sanitary method to start the siphon; never use your mouth to draw water through the hose.
Utility Pump Drainage
A submersible utility pump can move water to a suitable drain even when gravity drainage is impractical.
Select a pump specifically rated for the intended water-transfer application. Follow its electrical and immersion instructions, use required GFCI protection, and keep people out of the water whenever electrical pumping equipment is operating.
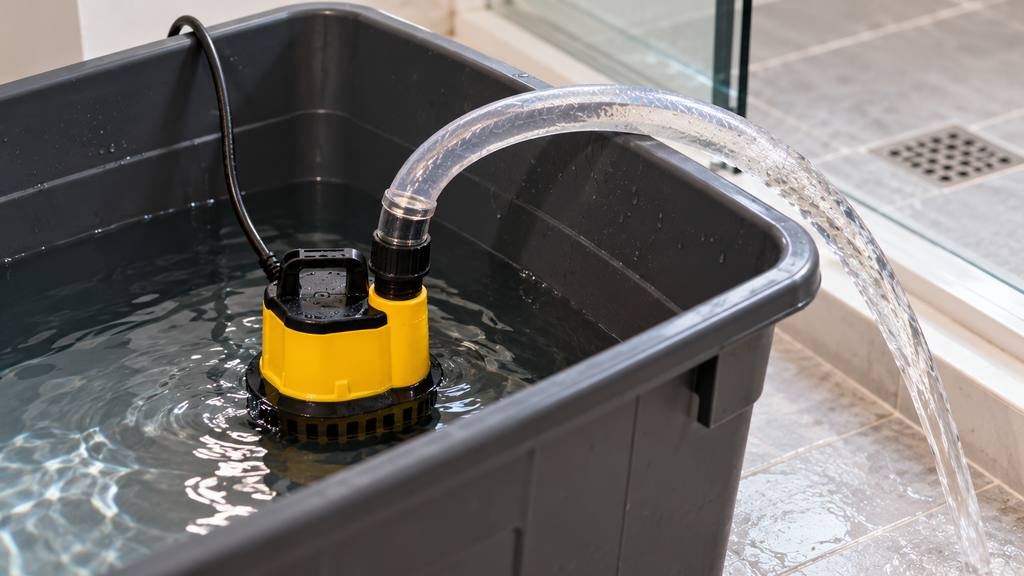
Owners who drain portable tubs after every session frequently find that hose routing and the last few inches of water take longer than expected, so test the complete drainage process before committing to a larger container.
Never discharge a plunge over a balcony railing or into an area where water could reach another apartment.
3. Sanitation: Cold Water Is Not Sterile
A DIY stock tank or cooler normally does not include a filtration or disinfection system.
Skin oils, sweat, dust, and microorganisms can accumulate even when the water looks clear.
For an occasional ice-only plunge, the simplest conservative approach is to empty, wash, rinse, and dry the container after each session.
Use cleaning products compatible with the container material and follow their instructions.
What About Pool Test Strips?
Pool or spa test strips can measure certain water chemistry parameters, such as pH and sanitizer concentration.
Pool and Spa Water Test Strips
However, test strips do not establish that water is microbiologically safe.
Do not guess at chlorine, bromine, or other chemical doses for a small DIY container. Chemical requirements depend on water volume, treatment products, circulation, and the equipment manufacturer’s instructions.
Never mix sanitizing chemicals or use household cleaning products as improvised in-water disinfectants.
If you intend to retain water between sessions, use a properly designed filtration and sanitation system with a documented maintenance procedure.
Once your DIY tub is built, you will need a few key items to keep it running. See our roundup of the best cold plunge accessories for compact cleaning tools and water-care products.
4. Space: Measure the Route, Not Just the Destination
A tank may fit in a bathroom but fail to pass through the doorway.
Measure the container’s exterior width, height, and length, as well as door openings, hallway turns, and available clearance.
Check that the tub will not block access to the toilet, shower controls, or room exit.
You also need somewhere to place a towel and enter or exit without slipping.
5. Temperature: Cooling Water Takes Energy
Adding ice to warm tap water can require more ice than expected.
For example, cooling 50 gallons of water from 70°F to 55°F removes roughly 6,255 British thermal units of heat, before accounting for the container and heat entering from the room.
That may require a substantial quantity of ice.
Insulation can reduce subsequent warming, but it does not eliminate the energy needed for initial cooling.
A waterproof thermometer is essential for checking actual water temperature.
Do not judge temperature by how cold the outside of the tank feels.
6. Electrical Safety: Keep It Simple
An ice-only tank requires no electrical cooling system.
That is a major advantage in a rental.
If you add powered equipment, use products approved for the intended application and follow the manufacturer’s electrical instructions.
Water and electricity are a particularly hazardous combination.
Do not use an extension cord to work around an inconvenient outlet unless the connected equipment explicitly permits it and the arrangement meets applicable requirements. A heavy-duty label alone does not make an extension cord suitable.
For permanent refrigeration equipment, a properly located receptacle and electrician-reviewed circuit are preferable to a cord running across the floor.
Step-by-Step: Planning a Chest-Freezer-Style Cold Plunge Safely
A conventional chest freezer cannot be made safe for human immersion simply by sealing its seams and adding a thermostat.
For that reason, the following process separates the planning steps that are useful from the modifications that should not be attempted on an ordinary household freezer.
The practical alternative is to use a water-rated insulated container with ice or a purpose-built chiller.
Step 1: Measure the Space and Calculate the Weight
Start with the proposed installation location.
Record the available floor dimensions, doorway clearance, and distance to a suitable drain.
Then calculate the expected water weight, container weight, and occupant weight.
If the structure cannot be confirmed suitable, stop the project.
For an upstairs apartment, do not assume that a smaller footprint makes a heavy tub acceptable.
Step 2: Select a Water-Rated Container and Cooling Method
For an occupied DIY plunge, choose a container whose manufacturer confirms suitability for the intended water load and human use.
A conventional chest freezer is not an appropriate substitute.
If you want a refrigerated system, select a purpose-built cold plunge chiller and compatible tub.
An external temperature controller such as an Inkbird may be useful for certain approved refrigeration applications, but it cannot certify or correct an unsafe freezer conversion.
Inkbird External Temperature Controller
Step 3: Inspect Seams, Fittings, and the Container Body
Before filling, inspect the container for cracks, damaged seams, loose drain fittings, and signs of deterioration.
Do not attempt to turn a household freezer into a bathtub by applying food-grade silicone to its seams.
Silicone may seal certain approved joints in equipment designed to contain water, but it cannot establish the structural or electrical safety of an ordinary freezer.
For a purpose-built water container, use only sealants and replacement fittings approved by its manufacturer.
Owners who try to fix every suspected leak with extra sealant often overlook the underlying cause, so inspect the container and fittings before attempting any manufacturer-approved repair.
Step 4: Establish Safe Temperature Control
For an ice-only tub, fill with tap water and add ice gradually while measuring the temperature.
For a purpose-built refrigerated system, follow the chiller manufacturer’s temperature settings and installation requirements.
An appropriate temperature controller is important for preventing unintended freezing in equipment designed to use one.
But a thermostat is not a substitute for safe electrical design, approved water containment, or required protective devices.
Never enter a water-filled conventional chest freezer, even when the compressor is switched off.
Step 5: Perform a Controlled Water Test
Before a full fill, test the approved container with a small amount of water in a location where any leakage can be safely contained.
Check the drain fitting, walls, and base.
Test the drainage hose or pump arrangement.
Only proceed to the intended operating water level after confirming the structure, installation, and drainage are suitable.
Do not use a water test to justify filling an ordinary freezer cabinet.
Step 6: Establish a Cleaning and Storage Routine
After use, drain the tub through the approved route.
Clean and rinse it using compatible products, then allow it to dry.
Inspect the container before the next session.
If you use a folding or portable vessel, store it only after it is completely dry.
Step 7: Use a Conservative Cold-Exposure Routine
Begin with relatively mild cool water rather than trying to reach near-freezing temperatures.
Enter slowly, keep your head above water, and avoid breath-holding or hyperventilation.
Have another adult nearby, particularly when you are new to cold immersion.
Exit immediately if you experience dizziness, chest discomfort, unusual breathing difficulty, or other concerning symptoms.
People with cardiovascular conditions or other relevant medical concerns should consult a healthcare professional before attempting cold immersion.
DIY vs. Buying a Commercial Cold Plunge: Is DIY Actually Worth It?
DIY is attractive because the container itself may be inexpensive.
But the real comparison is between complete, usable setups—not simply the price of a stock tank versus the price of an inflatable tub.
Example DIY Budgets
| Expense | Basic stock tank setup | Insulated stock tank setup |
| Suitable water-rated tank | $80–$180 | $100–$250 |
| Thermometer | $10–$25 | $10–$25 |
| Drain hose or fittings | $15–$40 | $15–$40 |
| Compatible exterior insulation and cover | $0–$30 | $40–$120 |
| Optional utility pump | $0–$80 | $0–$80 |
| Estimated initial total | $105–$355 | $165–$515 |
These are illustrative planning ranges, not live product quotations. Ice, cleaning supplies, structural evaluation, and optional refrigeration are additional expenses.
Where DIY Saves Money
A stock tank cooled with ice avoids the expense of a built-in refrigeration system.
It also lets you select a size that fits the available space.
If you already own suitable equipment, your initial cost may be lower.
Where DIY Costs More Than Expected
The hidden expenses include drainage equipment, insulation, repeated ice purchases, cleaning supplies, and time.
A stock tank may also be difficult to transport when moving apartments.
And if you add a chiller, the total cost can approach that of a purpose-built portable cold plunge.
When Buying a Commercial Tub Makes More Sense
A portable commercial tub may be the better choice when you need compact storage, an included drain hose, and straightforward assembly.
Purpose-built portable tubs are not automatically safe for every apartment, but they avoid some of the uncertainty involved in repurposing unrelated containers.
Our guide to the best cold plunge for renters compares options that require no permanent plumbing.
For renters who move frequently, paying a little more for portability may be worthwhile.
Frequently Asked Questions
Can I put a chest freezer in my apartment and use it as a cold plunge?
A conventional chest freezer should not be used as an occupied cold plunge.
It is not designed or approved to hold bathwater and a person, and an external thermostat does not eliminate electrical shock or structural hazards.
Choose a water-rated tub and ice or a purpose-built cold plunge cooling system instead.
Is a chest freezer cold plunge safe if I unplug it before entering?
Unplugging an appliance is not enough to establish safety.
The cabinet, seals, electrical components, and supporting structure were not designed for immersion use.
Do not rely on unplugging, added silicone, or an external thermostat as proof that a freezer conversion is safe.
Can I build a DIY cold plunge for under $200?
Possibly, if you find a suitable inexpensive stock tank, use ice, and already have safe drainage and an approved installation location.
However, a $200 budget may not cover a pump, insulation, ice, or other necessary accessories.
It also does not cover professional structural assessment if one is required.
How do I drain a DIY cold plunge without permanent plumbing?
Use an approved drain fitting and hose, gravity drainage, or a suitable utility pump.
Route the water to an appropriate drain and control the discharge rate.
Never leave draining unattended or discharge water where it could damage another unit.
How do I keep DIY cold plunge water clean?
For a basic ice-only tub without approved filtration and sanitation, draining and cleaning after each session is a conservative approach.
Use compatible cleaning products and allow the container to dry.
If you retain water between uses, follow a properly designed treatment program. Test strips alone do not guarantee safe water.
Can I use a galvanized stock tank indoors?
Potentially, if the tank is suitable for the intended use and the floor can safely support it.
You must also consider sharp edges, corrosion, drainage, access, and the possibility of leaks.
A plastic water-rated tank may be easier to move and maintain in some apartment settings.
How much ice does a DIY plunge need?
The amount depends on water volume, starting temperature, room temperature, and the target water temperature.
A large tank may require tens of pounds of ice for a substantial temperature reduction.
Use a thermometer and add ice gradually rather than assuming one bag will be sufficient.
Can I install a DIY cold plunge on my balcony?
Do not fill a cold plunge on an elevated balcony without written building approval and a qualified structural assessment.
Even a 40-gallon setup can exceed 500 pounds when occupied.
A waterproof mat does not increase the balcony’s structural capacity.
Final Recommendations
Best for Apartment Renters: A Compact Ice-Cooled Tub
For most renters, the safest practical DIY direction is a suitable compact water-rated container with no electrical cooling equipment.
Choose a size that accommodates your body without using unnecessary water.
Confirm the installation location can safely support the complete occupied load.
Arrange drainage before filling.
If your bathroom is small, an existing bathtub or a purpose-built portable plunge may be more practical than a stock tank.
Best for Ground-Level Homeowners: An Insulated Stock Tank
If you own a small home with a suitable ground-level garage or utility area, an insulated stock tank can be a reasonable low-cost project.
Use a compatible cover, a controlled drainage system, and a consistent cleaning routine.
For additional installation considerations, see setting up a cold plunge in a garage.
Best for Buyers Who Want Refrigeration: A Purpose-Built Chiller
If you want consistent cooling without purchasing ice, use a purpose-built chiller with an approved, compatible plunge tub.
Confirm water volume, electrical requirements, pump flow, filtration, and sanitation needs.
Do not attempt to achieve the same result by converting an ordinary household freezer into an occupied water vessel.
Our Overall Verdict
A DIY cold plunge for apartment use is worthwhile when it reduces cost without introducing unacceptable structural, electrical, or water-damage risks.
For most renters, that means a compact, ice-cooled, water-rated tub rather than a chest freezer conversion.
The container is only one part of the project. Safe floor support, reliable drainage, cleaning, and realistic cooling costs determine whether the setup will actually work in a small home.
If those requirements cannot be met, postponing the project or using an existing bathtub is the more sensible decision.
This post contains affiliate links. If you buy through them, we may earn a commission at no extra cost to you.